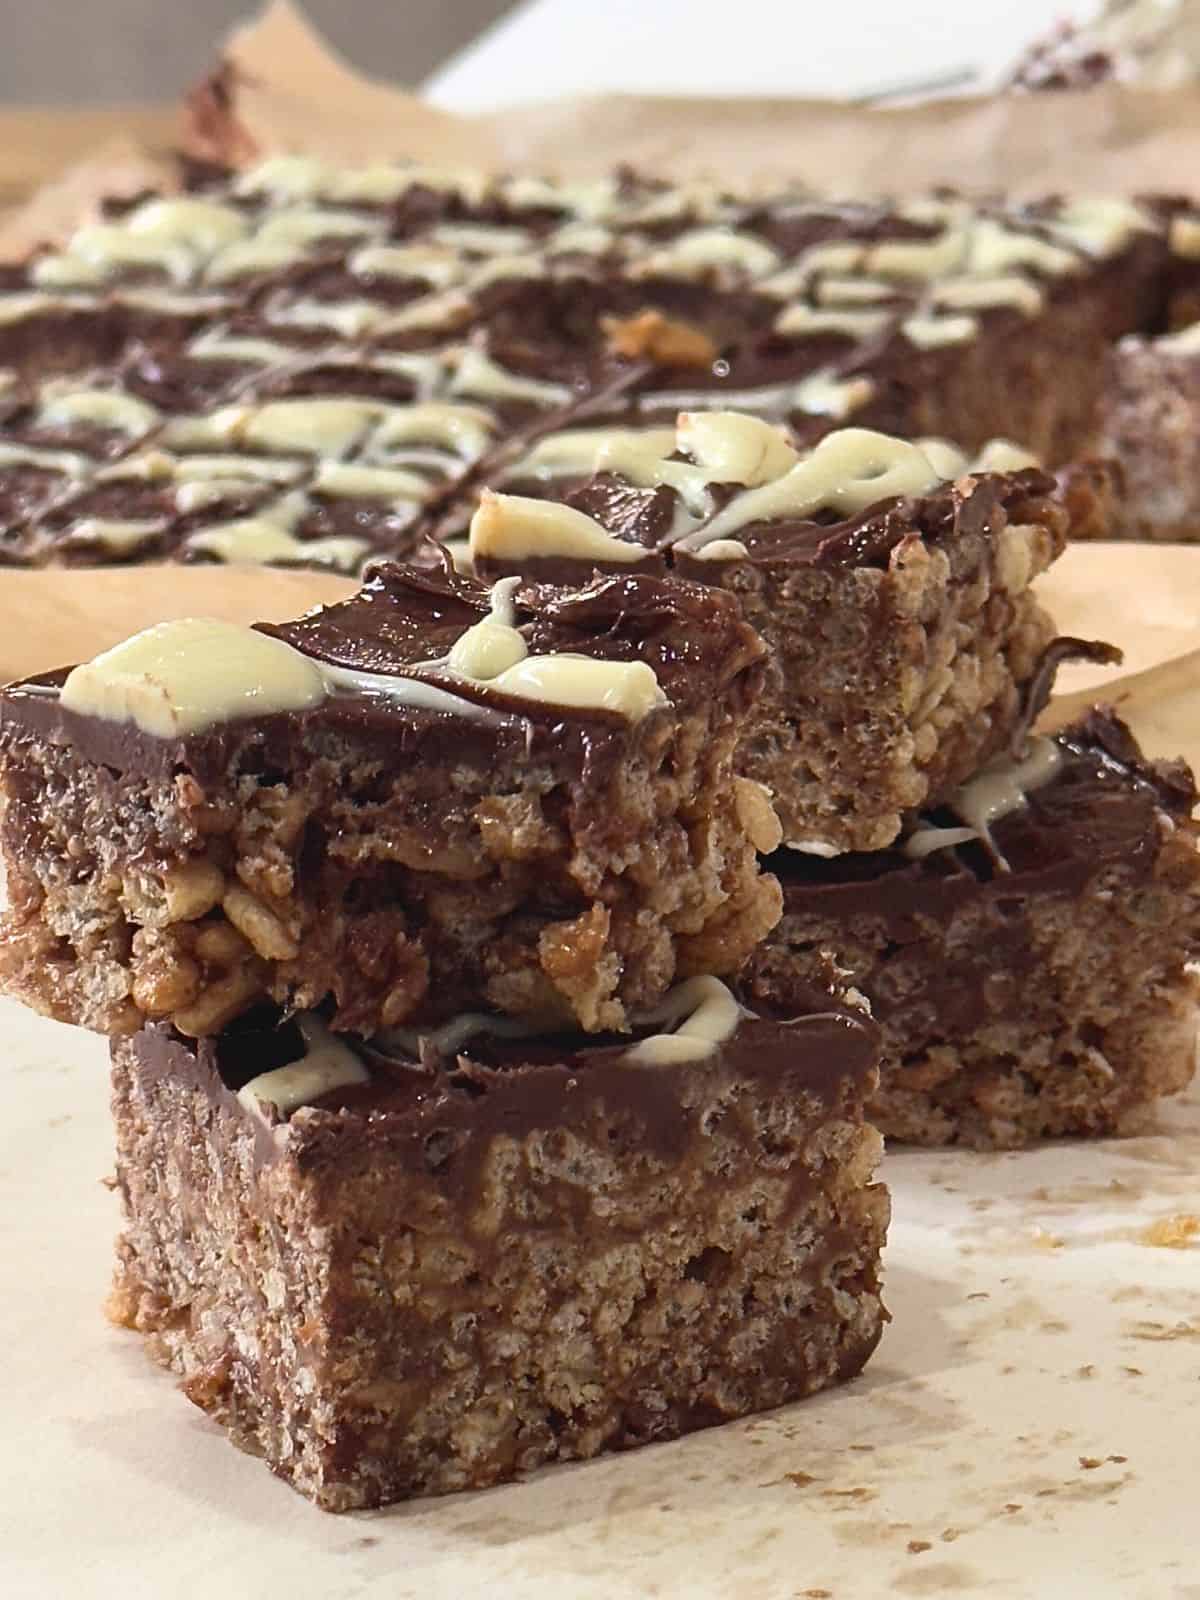
This Mars Bar Crispy Cake recipe is incredibly easy, yet undeniably impressive. Combining the chewy goodness of Mars bars with the satisfying crunch of Rice Krispies, and topped with a luscious layer of melted chocolate, this recipe is sure to become a favorite.
I promise this is the best recipe you'll find on the internet for Mars Bar cakes. I first made these for my Leaving Cert home economics project, and after making them over 100 times, I’ve perfected every little detail.
The secret: using more Mars Bars than most!
Did you try this recipe? Rating and sharing recipes is one of the best ways to support your favorite food bloggers. Leave a ⭐️⭐️⭐️⭐️⭐️ rating below and share it on Instagram, Facebook, and Pinterest!

This post is all about how to make mars bar crispy cakes, the ultimate recipe.
🙋♀️ Why This Recipe is Dietitian Approved
As a registered dietitian, I’m all about balance and flexibility when it comes to nutrition. Sure, these Mars Bar Crispy Cakes might not be your typical “Dietitian-Approved Healthy” recipe, but that’s okay! A healthy lifestyle isn’t about perfection; it’s about enjoying all foods in moderation. Treats like this can absolutely fit into a balanced diet, and I believe that enjoying the foods you love without guilt is essential for long-term health and happiness. I don't make these treats every week but when I do, I enjoy them whole-heartedly.
If you want a "healthier" version of these mars bar cakes, try my Protein Crisp Bars recipe.
🍳Tips for Choosing Ingredients
To make sure your Mars Bar Crispy Cakes turn out perfectly every time, here are a few tips when selecting ingredients:

- Mars Bars: For that classic flavour, stick to the original Mars bars, but you can experiment with other similar chocolate bars if you want to mix things up.
- Rice Krispies: For the best texture, use fresh Rice Krispies. Stale cereal will result in a less crunchy cake. Don't choose a puffed cereal, as it tends to be less crispy.
- Butter: Good quality butter will enhance the richness of the recipe. Unsalted butter is preferable, as the Mars bars and chocolate already contain enough sweetness and flavour.
- Chocolate: Whether you choose dark or milk chocolate depends on your personal preference. Dark chocolate offers a slightly less sweet, more intense flavor, while milk chocolate gives you that creamy, classic taste.
- Coconut oil helps the chocolate melt without lumps and gives the end result a shinier, glossy finish.
- Toppings: Get creative here and mix it up. My favourite way to decorate these cakes is with a drizzle of white chocolate. Other options could include chopped nuts, smarties, sprinkles, or even additional pieces of chopped Mars bar for extra indulgence. Or just leave them as is!
🥣 Equipment
My preference for this recipe is an 8.5" square baking pan. I think this is easier to work with as it is deeper than a baking tray. However, I have used baking trays in the past for this recipe and the outcome has been successful. However, I'd recommend opting to use one with an inch high edge if you can.
🥄 Substitutions for Different Dietary Needs
This recipe can easily be adapted for various dietary requirements:
Gluten-Free: To make this recipe gluten-free, use a certified gluten-free puffed rice cereal. Be sure to check the Mars bars, as not all versions may be gluten-free—there are gluten-free caramel chocolate bars available that could be used as a substitute.
Dairy-Free: For a dairy-free version, use dairy-free butter and dairy-free chocolate. There are plenty of vegan chocolate bars on the market that would work perfectly in this recipe.
Nut-Free: This recipe is naturally nut-free, but if you’re adding decorations like chopped nuts, be sure to use seeds or other nut-free toppings if you’re catering to someone with a nut allergy.
🔧 Instructions

Step 1: Prepare a baking tray by lining it with parchment paper or greasing it lightly with butter.

Step 2: In a saucepan, add the butter and the chopped Mars bars and melt slowly on low heat, stirring continuously. Be sure to keep the heat low to prevent burning.

Step 3: In a large mixing bowl, pour the melted Mars bar and butter mixture over the rice Krispies. Use a spatula to gently fold the mixture until all the rice Krispies are evenly coated.

Step 4: Transfer the Mars bar and Rice Krispie mixture to the baking tray, then use the back of a spoon or spatula to press it down evenly into the tray.

Step 5: In a separate bowl, melt the chocolate and coconut oil in the microwave or using a double boiler until smooth and creamy. If melting in the microwave, make sure to melt in small increments, e.g., 30 seconds at a time, stirring between each.

Step 6: Pour the melted chocolate over the Mars bar and Rice Krispie mixture, spreading it evenly with a spatula. If desired, sprinkle your choice of decorations over the melted chocolate.

Step 7: Place the baking tray in the refrigerator and allow the Mars Bar Munchies to set for at least 1-2 hours or until the chocolate is firm.

Step 8: Once set, remove the tray from the refrigerator and use a sharp knife to cut the Mars Bar Munchies into squares or bars. To make cutting easier, dip the knife into a mug of hot water between each slice. This technique helps prevent the mixture from sticking to the knife, ensuring clean and uniform cuts.
📦 Storage Tips
These Mars Bar Crispy Cakes are best enjoyed fresh, but they can also be stored for later:
Room Temperature: Store the crispy cakes in an airtight container at room temperature for up to three days. This will keep them chewy and delicious.
Refrigeration: If you prefer a firmer texture, store them in the refrigerator for up to a week.
Freezing: You can also freeze these treats for up to three months. Wrap individual squares in parchment paper to avoid them sticking together and store them in a freezer-safe bag or container. Thaw at room temperature before serving.

📜 The Recipe

Mars Bar Squares
Equipment
- 1 8.5" square pan I find a deep pan easier to use in comparison to a baking tray
Ingredients
- 170 g rice krispies
- 6 Mars bars (full size) chopped into small pieces
- 170 g unsalted butter
- 200 g melted chocolate dark or milk, as per preference
- 1 teaspoon coconut oil
- Decoration of choice e.g., white chocolate, chopped nuts or smarties
Instructions
- Prepare an 8.5" square baking pan by lining it with parchment paper or greasing it lightly with butter.
- Chop the Mars bars into small pieces. This will make them easier to melt.
- In a saucepan, add the butter and the chopped Mars bars and melt slowly on low heat. Stir the mixture continuously until the Mars bars have completely melted and combined with the butter. Be sure to keep the heat low to prevent burning.
- In a large mixing bowl, pour the melted Mars bar and butter mixture over the rice krispies. Use a spatula to gently fold the mixture until all the rice krispies are evenly coated.
- Transfer the Mars bar and Rice Krispie mixture to the baking tray, then use the back of a spoon or spatula to press it down evenly into the tray.
- In a separate bowl, melt the cooking chocolate in the microwave or using a double boiler until smooth and creamy. If melting in the microwave, make sure to melt in small increments, e.g., 30 seconds at a time, stirring between each. Chocolate can burn very quickly in the microwave, and there is no saving it if this happens.
- Pour the melted chocolate over the Mars bar and Rice Krispie mixture, spreading it evenly with a spatula.
- If desired, sprinkle your choice of decorations over the melted chocolate. This could include chopped nuts, smarties, sprinkles, or even additional pieces of chopped Mars bar for extra indulgence.
- Place the baking tray in the refrigerator and allow the Mars Bar Munchies to set for at least 2 hours or until the chocolate is firm.
- Once set, remove the tray from the refrigerator and use a sharp knife to cut the Mars Bar Munchies into squares or bars. To make cutting easier, dip the knife into a mug of hot water between each slice. This technique helps prevent the mixture from sticking to the knife, ensuring clean and uniform cuts.
- Serve and enjoy!
Video
💭Closing Thoughts
So, there you have it—the ultimate Mars Bar Crispy Cake recipe, complete with dietitian-approved flexibility! Remember, it’s all about balance, and there’s absolutely room in a healthy diet for treats like these. Whether you’re making them for a party, a cozy night in, or just because, these crispy cakes are sure to become a household favorite.
This post is all about how to make Mars bar crispy cakes.


Leave a Reply